Using Video and Graphics Clips with Alpha Channels
Ordinary video clips have three channels of information for red, green, and blue. An alpha channel is an additional channel that defines areas of transparency in the clip or image. If you import a QuickTime movie or a still image from another application, or a file that’s been created by a 3D animation program, it may have an alpha channel in addition to its color channels. An alpha channel is a grayscale channel where levels of white and black determine varying degrees of transparency applied to the color channels during compositing.
When you import a QuickTime movie or an image file, its alpha channel is recognized immediately. When you edit the movie or image file into a sequence, Final Cut Pro uses the alpha channel to composite the movie or image file against any clips appearing in video tracks below it.
Note: Alpha channels work the same in video and still-image media files.
Important: When you import a clip with an alpha channel that contains no data, the clip appears white. To display the clip properly, change the alpha channel for the clip to None (see Changing a Clip’s Alpha Channel Type).
Welcome to the world of Virtual Sets.
You are now ready to make your life easier by adding exciting
and visually stunning backgrounds to your chromakey footage.
Let's take a look at how easy it is to get up and running
with your new sets!
We're going to assume that you already have a good grasp
on how to chromakey in Final Cut Pro, and we're going to focus
on the other important element in your shot, the background.
For our tutorial, we're going to use virtual set "Studio
98", but the overall idea can be applied to any of our
virtual sets. Let's take a look at one of the more complex
sets that has a few background elements we need to adjust.
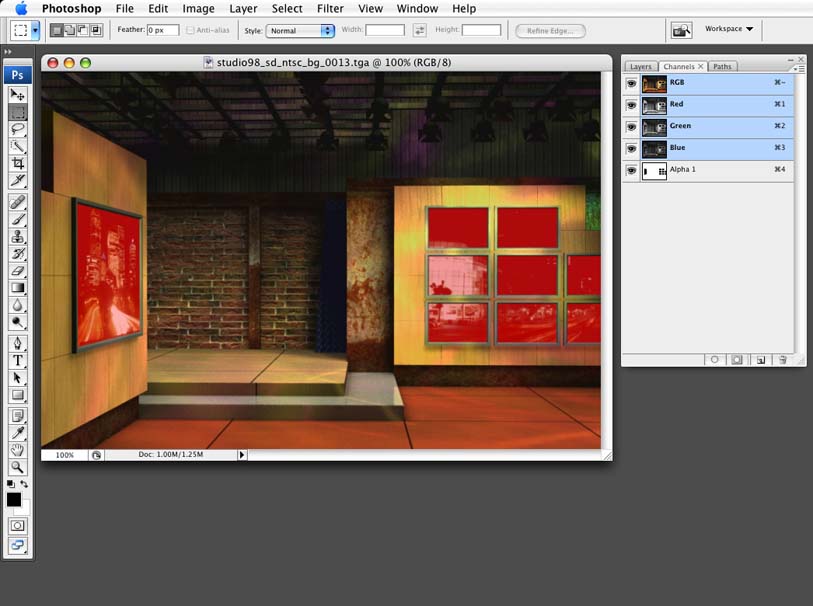
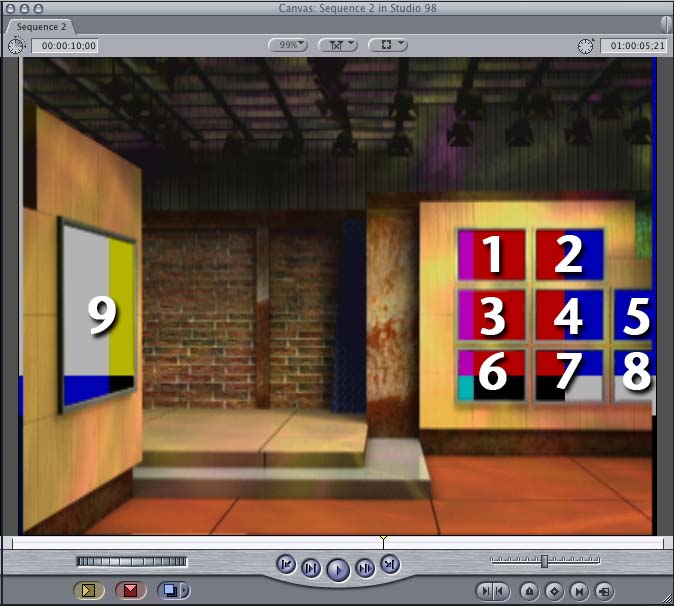
As you can see when looking at one angle of "Studio
98" in Photoshop, there are matte elements that have
been added to make it quick and easy to add elements in where
the keys are. This shot is a great example to use as there
are nine elements that need to be added to our shot.
Launch Final Cut Pro, and once the application is open, you
can import the desired image (the matted version) into Final
Cut Pro by simply dragging it from your desktop into your
project window, or by navigating to FILE>IMPORT>FILES.
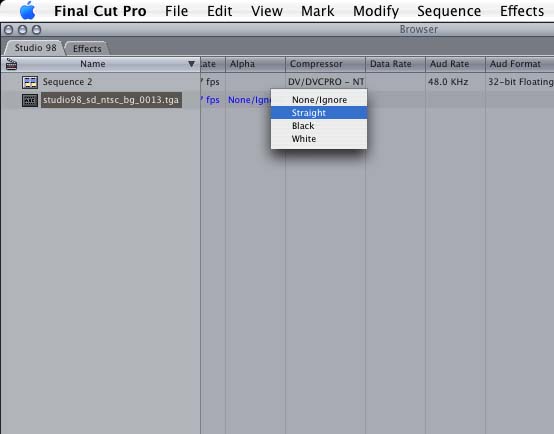
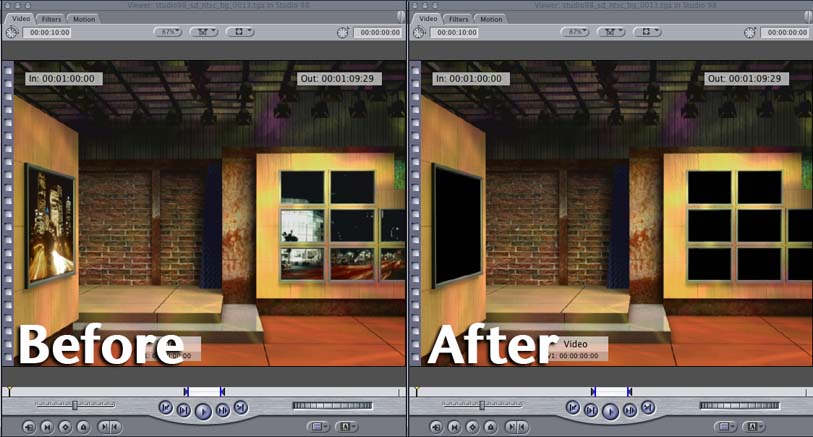
Something very important to keep in mind is that if you import
one of our images that has a matte attached to it, and you
do not see it in Final Cut Pro, there is a quick way to activate
it. In the Project window, simply navigate to your "Alpha"
column, and change the alpha from "None/Ignore"
to "Straight", and anywhere the virtual set has
a matte, it will turn black.
Now that our matte is activated, we are ready to put our
footage into our shot. For the purposes of this tutorial,
we are going to use Color Bars as our clip for all of our
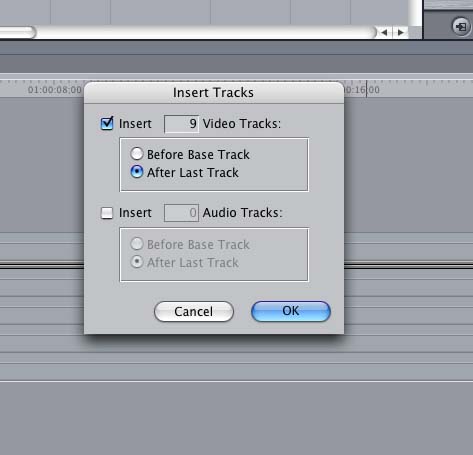
television monitors. We want to have different images in each
monitor, and since we have nine monitors, we are going to
need ten layers. Nine for our monitor images, and one for
the set, so create ten layers in Final Cut Pro by either right
clicking on the video portion of your timeline and selecting
"Add Track" or navigate to SEQUENCE>INSERT TRACKS,
and add the appropriate amount of tracks so that you have
ten in total.
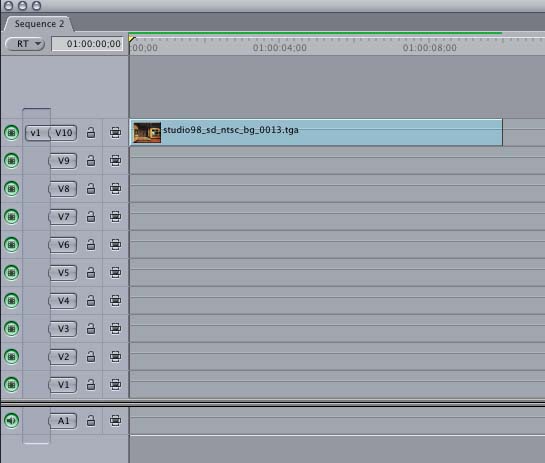
Now that we have our ten video tracks, we are going to add
our set element to the top most track (V10).
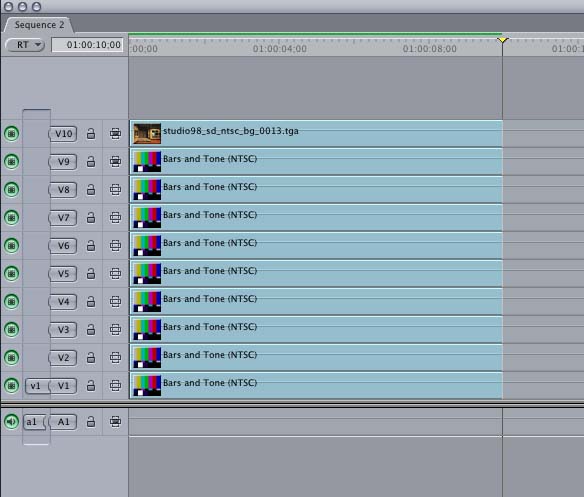
Next, we are going to edit in Color Bars to the first nine
tracks so we have all the footage we need to create our shot.
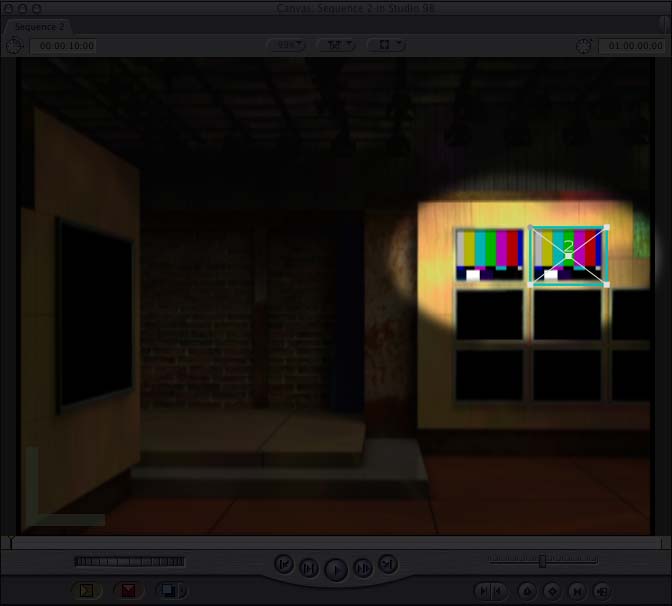
We are now ready to resize all our footage to fit in our
monitors. We will start with the small, upper-left monitor,
and work our way from left to right from there, with the large
monitor being the last layer (V9) that we manipulate.
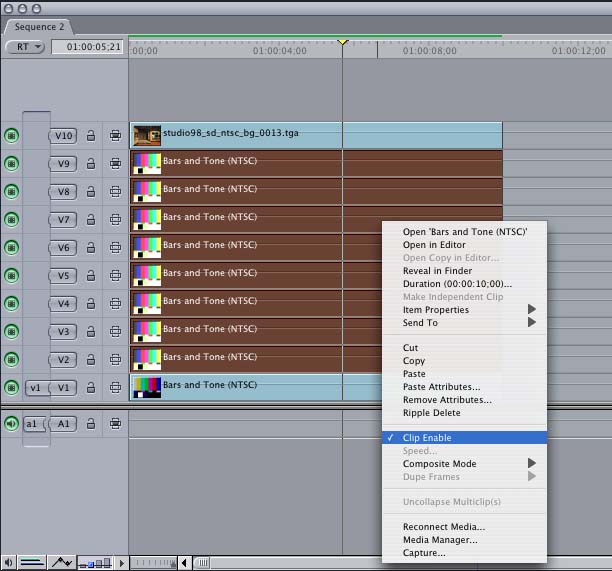
To make your job easier, you might want to disable the clips
that you are not working with, so that only one is visible
at a time. You can do this by selecting the clips you don't
want to see, right click on them, and deselect "Clip
Enable".
Now that we have one clip visible, we can manipulate it quite
easily to fit into monitor #1. Double click on the video in
V1, and select the "Motion" tab from your "Viewer"
window.
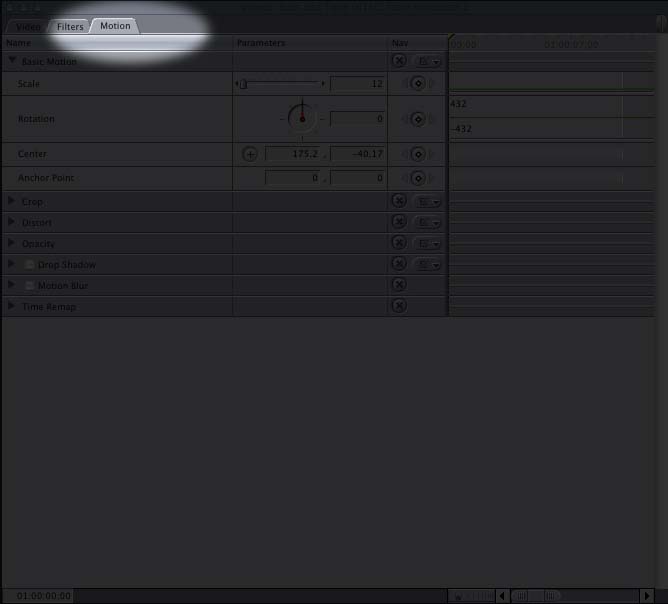
Adjust the "Scale" of the image to "12",
and the "Center" to "175.2, -40.17". As
you can see, the image now sits perfectly in monitor #1. To
adjust the next clip (V2), select the clip, right click on
it and select "Clip Enable" to enable it. Now, we
are going to copy and paste the attributes from the first
clip to the second clip. To do this, select the clip on "V1",
and press CMD+C to copy the clip's attributes. Now, select
the clip on "V2", and press OPT+V. You will now
see this window.

Since the parameter we want is "Basic Motion" (as
both Scale and Center fall into that category), select that
check box, and press "OK". You will immediately
see that your clip has taken on the parameters of the first
clip's "Scale" and "Center" position.
Now all we need to do is position the clip behind the second
monitor.
You can now repeat this technique for the other six monitors.
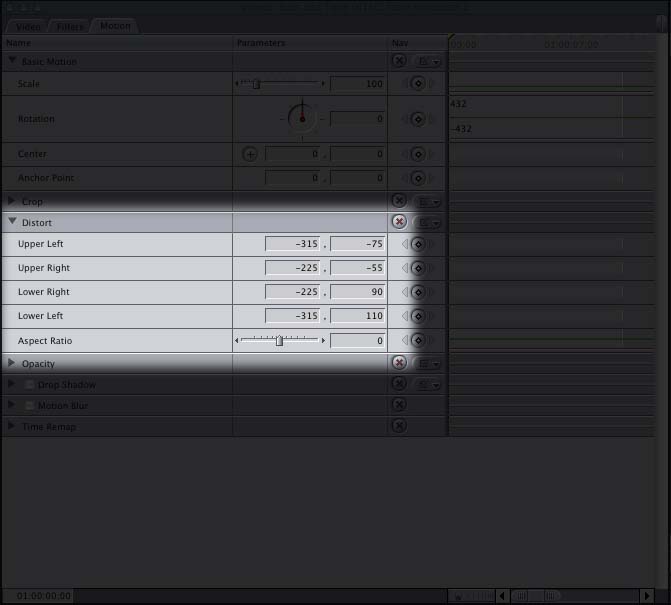
For the last, larger monitor, the technique we will use is
a little bit different. Select the clip on "V9",
double click on it to bring it up in the viewer, and select
the "Motion" tab. Since this monitor's perspective
is different from the other monitors, we are going to use
the "Distort" parameter to give our last clip the
proper perspective, so that it looks correct. Here are the
parameters you need to input to create the proper perspective
on your large monitor.
If you happen to have a Corner Pin third-party plug-in for
Final Cut Pro, you apply that effect to this layer, and quickly
drag-and-drop your corners where you want them.
Finally, many editors find it difficult to work with ten
layers in Final Cut Pro, so to clean up your timeline, you
can nest all ten of your compositing layers into one layer
by selecting them all, and pressing OPT+C to nest them down
to one layer.

If you need to adjust any one of your layers at a later time,
simply double click on the nest layer to access all the individual
layers.
Your background element should look like this.
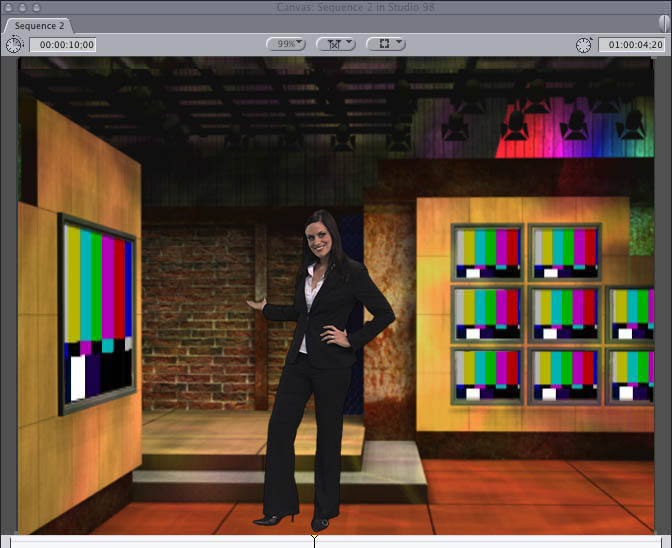
To add your talent to the background element you have created,
simply insert the footage onto "V2", add your chromakey
effect, and adjust the key, scaling and position to your liking
to create a realistic looking image.
One final thought to keep in mind is that many of our virtual
sets come with foreground elements like desks and other set
pieces you might want to add into your shots. To do that,
the same technique applies, just remember that since they
will be located in the foreground, you will want them to be
on your top most layer. Happy chromakeying!
|