Magix Vegas is a common tool used in post production virtual sets. I'm going to walk you through the steps of making a basic set using Studio 145, a news room from virtualsetworks.
To start, create a project at the resolution you will be working at, in our case we will be doing HD1080. Import the footage of your talent on greenscreen and some footage or graphics to display on the desk and a picture to put out the window. Next we need to import the virtual set.
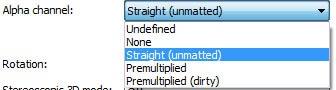
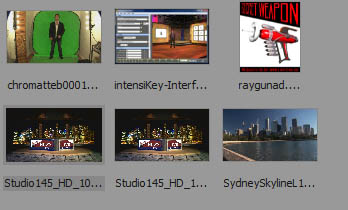 Studio 145 has mattes for a desk and a screen, in this case the desk mattes have an A in the name and the screen mattes have a B in the name. When you import the sets you need to right click on them and choose properties. Under Alpha, you need to choose Straight (unmatted). The icons should change to show the set as a desk and the set with holes where the windows are. Studio 145 has mattes for a desk and a screen, in this case the desk mattes have an A in the name and the screen mattes have a B in the name. When you import the sets you need to right click on them and choose properties. Under Alpha, you need to choose Straight (unmatted). The icons should change to show the set as a desk and the set with holes where the windows are.
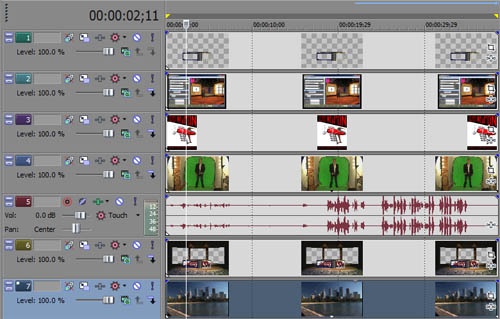
Vegas' timeline works in a top down mentality. The highest track, in this case the Desk layer, will be shown first, then the desk graphics, then the Talent, and so on. At this point we only see the desk over the desk graphics.
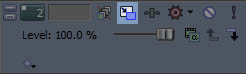 Let's start by getting the graphics into the desk screens so we can see what's behind the desk. Click the Track Motion Button of first graphic or video you want to place in the desk screen. Let's start by getting the graphics into the desk screens so we can see what's behind the desk. Click the Track Motion Button of first graphic or video you want to place in the desk screen.
If we are placing something into the set that is square with the camera, the default Source Alpha setting will do, giving you 2D control over
placement. 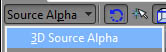 In this set there is a slight perspective cant to the screens so we will need to change the Track Motion interface to 3D Source Alpha. This may take some getting used to but with this tool you can perspectively place your graphics and video into screens in the virtual set. In this set there is a slight perspective cant to the screens so we will need to change the Track Motion interface to 3D Source Alpha. This may take some getting used to but with this tool you can perspectively place your graphics and video into screens in the virtual set.
 If you find your content is not the same shape (or aspect ratio) you will need to use the cropping tool as well. Make sure you turn off Lock Aspect Ratio and Size About Center. This is another tool that may take some learning but it's very powerful. If you find your content is not the same shape (or aspect ratio) you will need to use the cropping tool as well. Make sure you turn off Lock Aspect Ratio and Size About Center. This is another tool that may take some learning but it's very powerful.
Your set should now have the graphics or video placed into the screens and you should now be able to see your unkeyed talent.
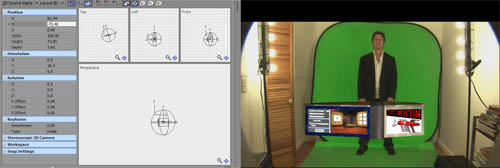
 You will find the Magix Vegas Chroma Keyer under Track Effects. This will open a dialog where you can find and add the Chromakeyer to your talent clip. You will find the Magix Vegas Chroma Keyer under Track Effects. This will open a dialog where you can find and add the Chromakeyer to your talent clip.
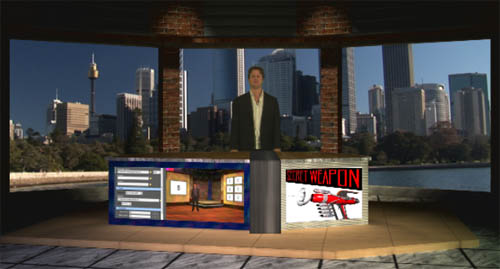
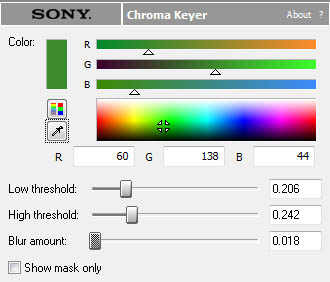 What the Vegas Chroma Keyer lacks in buttons and switches it makes up for with ease of use. The eye dropper is used to pick the background color (I recommend this over using one of the presets). Bring the Low and High threshold sliders together until your talent is solid but your background is fully keyed. A negligable amount of blur will help with the edges. You can also use the Show mask only option to see if there are any areas that need cleaning or adjustment. Once you are satisfied with your key it's back to the Track Motion and Event Pan\Crop tools. When you have sized and cropped your talent properly you should see the rest of your set behind your talent and the bottom layer of background video out the windows which you can size to your taste if needed. What the Vegas Chroma Keyer lacks in buttons and switches it makes up for with ease of use. The eye dropper is used to pick the background color (I recommend this over using one of the presets). Bring the Low and High threshold sliders together until your talent is solid but your background is fully keyed. A negligable amount of blur will help with the edges. You can also use the Show mask only option to see if there are any areas that need cleaning or adjustment. Once you are satisfied with your key it's back to the Track Motion and Event Pan\Crop tools. When you have sized and cropped your talent properly you should see the rest of your set behind your talent and the bottom layer of background video out the windows which you can size to your taste if needed.
|