| |
Virtual Sets in Premiere Pro Tutorial |
| |
|
Adobe Premiere Pro CS5 is a common tool used in post production virtual sets. I'm going to walk you through the steps of making a basic set using Studio 172, a news room from virtualsetworks.
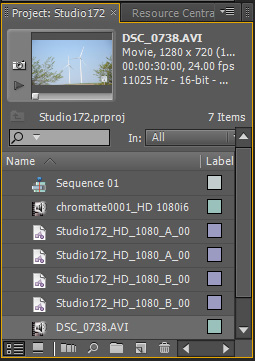
To start, create a project at the resolution you will be working at, in our case we will be doing HD1080. Import the footage of your talent on greenscreen and some footage to display in the screen behind the talent. Next we need to import the virtual set.
Studio 172 has mattes for a desk and a screen, in this case the desk mattes have an A in the name and the screen mattes have a B in the name. I've picked angles 2 and 15 to use for showing a desk shot and a simpler standing shot. At this point you should have 6 pieces of media in your project, now to bring them to the timeline.
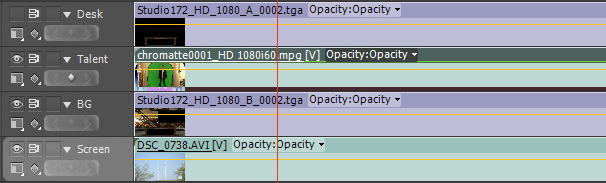
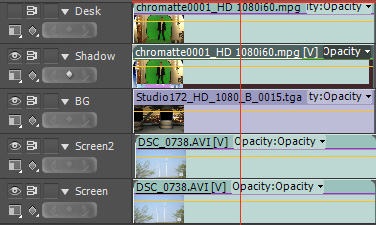
Premiere's timeline works in a top down mentality. The highest track, in this case Desk, will be shown first, then Talent, and so on. At this point we only see the desk over the unkeyed talent.
Let's start by getting the talent in shape by keying, masking, and sizeing the talent appropriately.
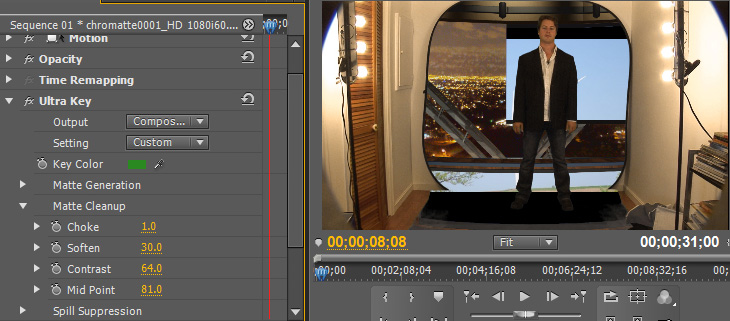
CS5 has the Ultra Key chromakeyer in it which is pretty good and easy to use, pick your color and adjust the settings until your talent is left keyed in front of the background. If you don't have CS5 you can use the Chromakey effect filter.
Next we crop out the parts of the image not covered by the greenscreen using the Crop tool in the Transform bin of video effects.
Last, open the Motion settings and size and move your talent into position so they appear proportional to the set.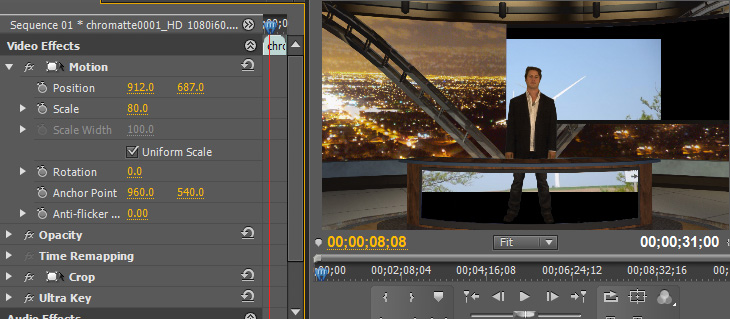
At this point we have the talent standing behind the desk and we can see the virtual set, but in this case the desk has a big hole in it which isn't looking right because this set is expecting a graphic there, additionally the screen behind the talent doesn't have it's material properly set up.
I've whipped up a graphic to go into the desk screen which looks suspiciously like the one that comes with the set, but in fact anything could go there. I've created a new track for this and put it behind the desk matte, but in front of the talent matte and named is DeskGFX.
Next we need to address the content in the screen. This is the bottom track named screen. The basic Motion settings are fine for any screen that is square to the screen but if it's at a slight angle like this one here you will want to use the Corner Pin in the Distort folder of the Video Effects. The Corner Pin will let you position each corner of the video where you want it to go.
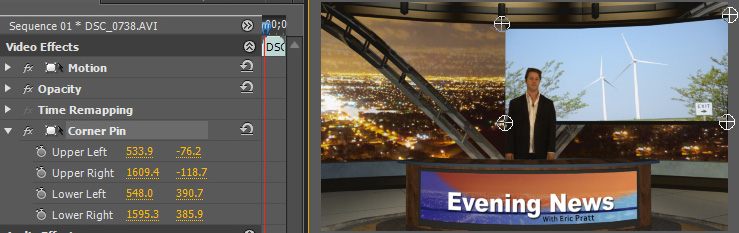
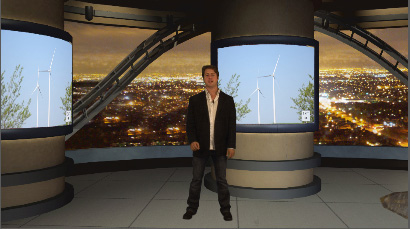
Looking good, we have our talent layered in behind our desk presumably talking about wind turbines. Let's take in one more angle to address some other attributes.
In this second angle I've used shot 15 which has the talent standing. I've gone ahead an keyed the talent, placed him on the background, added the background layer in, and I've corner pinned two tracks of footage into the screens. What I'd like to do now is add a shadow.
I've copied my talent track, already keyed, and placed it on the track below. Under scale I've unlocked Uniform Scale and I've squashed this copy of my talent and using Position I've dropped him down so that their feet will still touch. I've turned off the real talent for a moment to show how I've done this.

Next I'll darken, blur and adjust opacity. Make sure you add the darken and blur effects below the chromakeyer or it will affect your key. I've used Brightness & Contrast and Gaussian Blur and then cut the Opacity to 50%.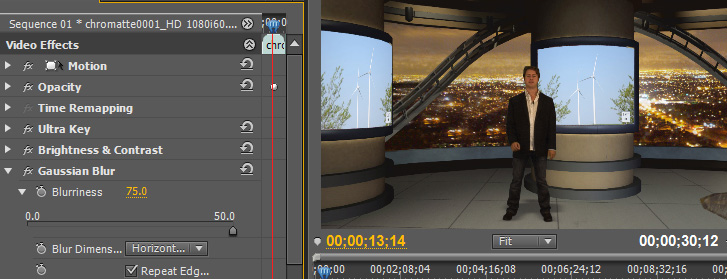
Viola, shadow. The neat thing about this shadow is it will follow the talent, if he sticks out his arm so will the shadow. This is the same technique you can use to make a reflection, except the talent is inverted and you don't darken them.
Hopefully that sheds some light on this powerful tool when it comes time to do your next virtual set in Premiere Pro.
|
|